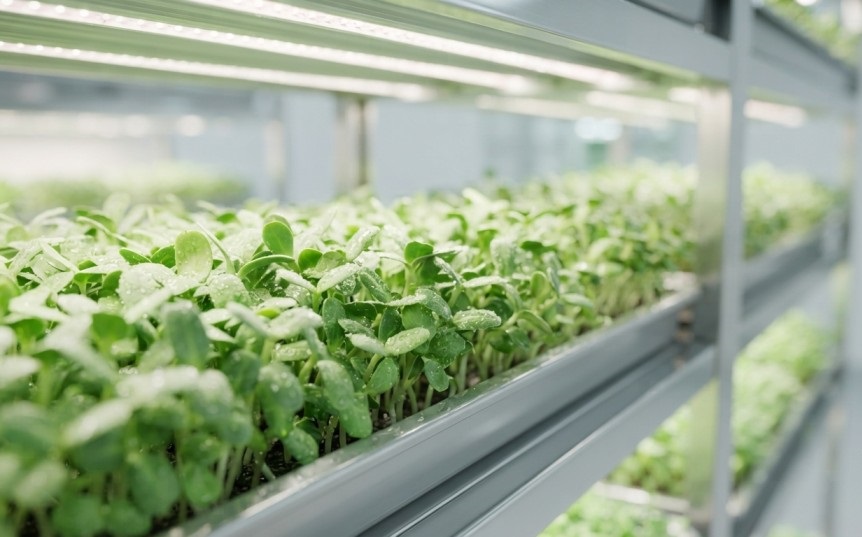
Fresh, pesticide-free greens harvested right from your kitchen counter or balcony in under ten days might sound too good to be true—yet millions of urban families are doing exactly that. Learning how to grow microgreens at home in india requires no backyard, no heavy gardening tools, and no prior farming experience. With a shallow tray, clean cocopeat, untreated seeds, and a bright spot near a window or simple LED light, you can harvest crisp, nutrient-packed superfoods all year round.
At Greenu, we help beginners across Indian apartments—from humid coastal homes in Mumbai and Chennai to dry summer flats in Delhi NCR, Jaipur, and Bengaluru—turn small indoor corners into reliable mini-farms. Follow this practical, step-by-step roadmap to get a lush, mold-free first harvest on your very first try.
Why Growing Microgreens at Home Makes Sense in India
Unlike full-sized leafy vegetables that take 45 to 60 days and struggle with pests, heatwaves, or limited balcony sunlight, microgreens are harvested at the cotyledon or first true-leaf stage (7 to 14 days).
-
Zero Pesticides & Maximum Freshness: You control the seeds, water, and growing medium, cutting greens minutes before eating when vitamin and antioxidant levels peak.
-
Tiny Space Requirement: Two 10×20-inch trays fit easily on a kitchen shelf, utility ledge, or small metal rack.
-
Cost-Effective Nutrition: Store-bought gourmet microgreens often cost ₹150 to ₹300 per 100g punnet, whereas home-grown trays cost a fraction of that per harvest.
-
All-Season Reliability: Because microgreens grow indoors under ambient room light or inexpensive LEDs, monsoon downpours and peak May heat will not ruin your crop.
Essential Supplies You Need Before Starting
You do not need expensive hydroponic kits to master how to grow microgreens at home in india. Gather these five simple items first:
-
Two Shallow Trays (10×20-inch or 8×12-inch): Use one tray with drainage holes at the bottom and one solid tray without holes underneath it for easy bottom-watering. Food-grade plastic trays or recycled takeaway containers with poked drainage holes both work well.
-
Clean Growing Medium: Washed, low-EC cocopeat is the gold standard in India because it holds moisture evenly, drains well, and stays lightweight and pest-free. Organic potting mix or unbleached hemp/jute grow mats are also great options.
-
Untreated, High-Germination Seeds: Always buy seeds labeled specifically for microgreens or sprouting. Standard agricultural seeds sold at local nurseries are often coated with pink or blue chemical fungicides that are unsafe to eat raw.
-
Spray Bottle (Mister): Needed for gentle top-misting during the first 2 to 3 days of germination.
-
Light & Airflow: A bright window receiving 4 to 6 hours of indirect daylight, or a basic 18W–20W cool-white LED batten hung 8 to 12 inches above the tray, paired with natural room ventilation or a small fan.
Best Beginner Microgreen Seeds for Indian Homes
Start with forgiving varieties that germinate quickly and handle Indian room temperatures (20°C–30°C) without fuss:
| Seed Variety | Pre-Soak Needed? | Blackout Period | Days to Harvest | Flavor Profile |
| Mustard (Yellow / Black) | No | 2–3 days | 7–9 days | Peppery, sharp, zesty |
| Radish (Pink / White Daikon) | No | 2–3 days | 6–8 days | Crisp, spicy, vibrant stems |
| Broccoli | No | 3 days | 8–10 days | Mild, fresh, earthy |
| Fenugreek (Methi) | Optional (4–6 hrs) | 3 days | 8–10 days | Familiar, mildly bitter, aromatic |
| Green Moong / Pea Shoots | Yes (8–12 hrs) | 3–4 days | 9–12 days | Sweet, crunchy, hearty |
| Black Oil Sunflower | Yes (8–12 hrs) | 3–4 days | 8–12 days | Nutty, thick, juicy stems |
Step-by-Step: How to Grow Microgreens at Home in India
Step 1: Prep Your Growing Medium
If using dry compressed cocopeat blocks, soak them in clean water until fully expanded, then squeeze out excess moisture. Your cocopeat should feel like a wrung-out sponge—damp to the touch, never dripping water when squeezed. Spread an even 1 to 1.5-inch layer into your perforated tray and gently press it flat with your palm or a flat board so seeds sit at a uniform depth.
Step 2: Sow Seeds Evenly (Don’t Overcrowd!)
Mist the surface lightly, then scatter your seeds evenly across the cocopeat. Aim for dense coverage where seeds sit close together without piling into two or three thick layers on top of one another. Overcrowding traps moisture and invites mold—one of the most common beginner mistakes. Press the seeds gently into the damp cocopeat so they make firm contact, then mist the top lightly.
Step 3: The Blackout & Weight Phase (Days 1 to 3)
Place your seeded tray inside the solid bottom tray and cover it with a second inverted tray (or a flat plate with a light 500g–1kg weight on top for sturdy crops like radish, sunflower, and peas).
-
Why do this? Darkness mimics soil cover, encouraging roots to anchor downward while stems stretch upward evenly.
-
Daily Care: Lift the cover twice a day (morning and evening), give a light mist with clean water, and put the cover back. Keep the tray in a warm, shaded spot out of direct sun.
Step 4: Introduce Light & Switch to Bottom-Watering (Days 4 to 8)
Once the shoots stand about 1 to 1.5 inches tall with pale yellow leaves, remove the blackout cover and move the tray under bright indirect window light or your LED grow light (12 to 14 hours on, 10 to 12 hours off). Within 12 to 24 hours, photosynthesis kicks in and the leaves turn rich, vibrant green.
-
Switch to Bottom-Watering: Stop spraying the leaves from above once the cover comes off. Instead, pour 150ml to 250ml of water directly into the solid bottom tray and let the roots drink upward through the drainage holes for 15 to 20 minutes. Pour out any unabsorbed standing water afterward so roots stay oxygenated.
Step 5: Harvest & Store Properly (Days 7 to 12)
Your microgreens are ready to harvest when the cotyledons are fully open and the first tiny true leaves begin peeking out between them.
-
Harvest Dry: Skip watering 8 to 12 hours before cutting so leaves are completely dry.
-
Cut Cleanly: Hold a bunch gently and snip 0.5 inches above the cocopeat surface using clean, sanitized kitchen scissors.
-
Storage: Place dry, unwashed microgreens into an airtight or breathable food-grade container lined with a dry paper towel at 4°C–6°C in your fridge. Wash only right before eating—stored dry, they stay crisp for 7 to 10 days.
Troubleshooting Common Issues in Indian Weather
Even experienced growers run into occasional hiccups during humid monsoons or peak summer afternoons. Here is how to fix them fast:
-
White Fuzz on Roots vs. True Mold: Beginners often panic when they see fine, hair-like white fuzz near the base of radish or broccoli stems. Those are root hairs looking for moisture—simply mist lightly and they vanish. True mold looks cobwebby, gray, or slimy and smells musty; if you spot localized mold, scoop out that patch immediately, improve airflow with a small fan, and reduce watering frequency.
-
Leggy, Pale Stems: If shoots grow tall, thin, and floppy, they need stronger light or closer LED placement (
8–10 inchesabove the canopy). -
Seed Hulls Sticking to Leaves (Sunflower & Coriander): Gently mist the canopy during the blackout phase to keep hulls soft, and lightly brush your clean hand across the tops once under light to help hulls drop off naturally.
At Greenu, we recommend starting with just two trays staggered 4 days apart. That simple rhythm gives you a continuous supply of fresh greens every single week without feeling overwhelmed.
Frequently Asked Questions (FAQs)
1. Can I grow microgreens in India without sunlight?
Yes. Microgreens thrive indoors under standard 18W–20W cool-white LED tube lights or full-spectrum grow bars kept 8 to 12 inches above the trays for 12 to 14 hours daily.
2. Can I reuse cocopeat after harvesting microgreens?
It is best not to reuse cocopeat directly for a second indoor microgreens batch because dense root mats remain inside and can carry fungal spores. Instead, compost used cocopeat or mix it into your outdoor balcony pots and ornamental planters.
3. Do I need fertilizers or nutrients to grow microgreens?
No. Seeds already store all the energy and nutrients the plant needs for its first 7 to 14 days of growth. Clean water and a well-drained medium like washed cocopeat are all you need.
4. How much does it cost to start growing microgreens at home in India?
You can start a two-tray home setup for under ₹500 to ₹1,200 using basic trays, a cocopeat brick, a spray bottle, and two packets of untreated microgreen seeds.
5. Which microgreens grow fastest at home for beginners?
Radish, mustard, and fenugreek (methi) are the fastest and easiest for Indian beginners, typically ready to snip and eat within 6 to 9 days.